|
| Click to play Make your own Smilebox |
Thursday, May 17, 2007
 |
| Click to play Make your own Smilebox |
What a wonderfully fun day! We decided to go to the zoo. Little did we know that 69 school buses full of CHILDREN would also think that it was the perfect day for a zoo outing. It was a bit cool out but it made walking around more bearable. The zoo babies were so cute!
The biggest hit of the day was that Lisa could get ride wristbands for FREE with her gold membership so the kids could ride the train, tram and merry go round as much as they wanted! This was such a huge treat for my kids who usually never get to ride any of these things because I refuse to pay $3.50 a person for a 5 minute train ride. I lost count of how many times they rode the merry go round!
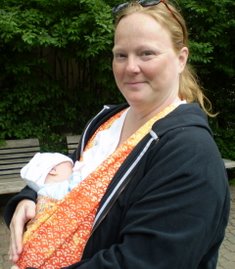
Luke was WONDERFUL! He slept in his sweetpea wrap the majority of our visit and he didn't fuss once!
Sunday, May 13, 2007
Invisible pee
One of the things that any family with more than one child who is actively involved in outside activities usually discovers is that the family must often "split up" in order to get everyone to where they need to be. I started driving again last week, less than 3 weeks after my c-section,so Saturday morning we did the typical divide and conquer. Jay dropped Hannah and Emily off at the dance studio and then took Cade to his 10 AM game, Grant and Brett joined him so that they would be with him for the 1 PM game. I got to take Jacob to his game, with Sophia, Will and Luke in tow!
I could go off on a tirade here about how horrible Jacob's team is, well, not the "boys" but the coaching staff. And this week my frustration was compounded by a young, ignorant umpire. Having been around baseball for the past 12 years as a parent and coach's wife, I tend to be fairly aware of the rules and the etiquette of the game, even though I don't always pay attention. It doesn't set well with me when a coach tells a base runner to "run over" the catcher (probably pisses me off more than most since Brett used to catch when he played and Grant is the starting catcher on his team) or when boys are encouraged (by loud cheering) to slide head first into home. The umpire didn't bother to correct the boys or call the "sliders" out (per knothole rules).....oh I forgot,I wasn't going to go off on a tirade....
Back to the point of the post....one of the things I hate the most about most baseball fields is the lack of "modern" bathrooms, meaning at best we usually end up with smelly, overfilled portapotties.....during the second inning(for those of you unfamiliar with baseball that would be about an hour into this game) Sophia and Will decided the had to go to the bathroom. Sophia willing went into the portapotty (amazing since she often refuses, especially when the smell bad) then it was WIll's turn.....newly potty trained (less than a week under his belt!) he INSISTED on taking his pants completely off and then TRIED to stand up and pee in the potty....it was too high so then he CLIMBED up and tried standing on the toilet seat.....I am freaking out (inside) as he touches so much of the stinky toilet, but there really isn't anything I can do since I am holding Luke. After about 3 minutes of climbing and maneuvering about he announces....
"I think I just make INVISIBLE PEE in here. I don't like it."
"OK" I am a bit puzzled "So are you done?"
"No" then he shakes his butt a few times "Now I done. My invisible pee when down that hole."
So we get redressed. There is no hand sanitizer or water, what stupid ass man decided that you didn't at least need hand sanitizer next to a portapotty....I insists that we walk all the way back to the van and get baby wipes and hand sanitizer out of the diaper bag. It creeps me out to think of all the germs that his small body encountered on his journey to make invisible pee!
BTW, he managed to wait almost 2 more hours to pee, until we were safely home and he only had to climb around in OUR germs!
Saturday, May 12, 2007
May 11th Imago Earth (www.imagoearth.org)
Native American Overview
10:30-12
$4.00 per participating student
Ages: All
This shorter Native American encounter features the highlights of our full-day experience. Students will learn how local Native Americans lived in the forests with particular attention paid to the hunting, gathering, and growing of food, the making of clothes, and the tools associated with everyday life. Face painting and a skill game will also be included.
Meets the following Ohio Academic Content Standards(not that as an unschooler I care! LOL) : 1st grade History 3-5, People in Societies 1-3; 2nd grade History 4-5, People in Societies 2-3, Economics 1; 3rd grade People in Societies 1,3; 4th grade History 2, People in Societies 1; 5th grade History 2, People in Societies 1-2; 6th grade People in Societies 1.
I can't say that we were very impressed with this program, but the weather was gorgeous and our group leader did an OK job leading our group. The kids would have probably enjoyed a program that was a bit more hands on. Luke slept the entire time in his new sweet pea wrap...of course I forgot to get a picture of him in it!
Native American Overview
10:30-12
$4.00 per participating student
Ages: All
This shorter Native American encounter features the highlights of our full-day experience. Students will learn how local Native Americans lived in the forests with particular attention paid to the hunting, gathering, and growing of food, the making of clothes, and the tools associated with everyday life. Face painting and a skill game will also be included.
Meets the following Ohio Academic Content Standards(not that as an unschooler I care! LOL) : 1st grade History 3-5, People in Societies 1-3; 2nd grade History 4-5, People in Societies 2-3, Economics 1; 3rd grade People in Societies 1,3; 4th grade History 2, People in Societies 1; 5th grade History 2, People in Societies 1-2; 6th grade People in Societies 1.
 |
 |
| Click to play | Make your own Smilebox |
I can't say that we were very impressed with this program, but the weather was gorgeous and our group leader did an OK job leading our group. The kids would have probably enjoyed a program that was a bit more hands on. Luke slept the entire time in his new sweet pea wrap...of course I forgot to get a picture of him in it!
Friday, May 11, 2007

Fossil Program and Dig
Caesar Creek State Park Visitors center (513) 897-1050
Friday, June 1st at 10:00am
Open to homeschoolers of all ages
Free
We need a minimum of 25 kids to do this program so please RSVP by May 15th
RSVP to Deanne
It is recommended to wear sturdy walking shoes, dress to get dirty and bring a bag to put your fossils in. I suggest packing lunch because I don't know if there's any place close to get food.
The day will go something like this
10:00-11:30 Meet at the visitors center. A park ranger will take us outside for a pond study and hike. Then we'll go back to the visitors center to look at the exhibits and have an indoor fossil program.
11:30 We'll eat lunch
After lunch a Ranger will accompany our group to the area where we will dig for fossils.
All who collect fossils must obey the following rules.
1) Fossils may be collected for personal use only.
2) No tools of any sort may be used to collect fossils.
3) Only fossils that are palm-sized or smaller may be taken from the spillway.
4) Vehicles must be parked off the road in the designated area or on the shoulder of the road.
5) No one is allowed to climb the rock walls or the area of debris below the wall
Thursday, May 10, 2007
 River Rats!
We decided to take advantage of Wednesday's absolutely gorgeous weather and 80 degree temperatures and headed down to the river. Right near our house is a wonderful little inlet to the river where you don't have to worry about the current or the water levels

getting to deep for the little ones. There is plenty of river life for the catching, our prey of choice on this expedition seemed to be juvenile water snakes. The kids had an absolute ball trying to catch them. They managed to get two, one they names Sammy and the other Bebe (which stood for bad biter....bet you can't guess how that one got its name now can you?). Both Grant and Cade got bit but neither seemed to mind. The kids had an absolute blast exploring the banks and even encountered a couple of larger snakes. There were also plenty of small fish in the inlet area. The kids can't wait for our next free afternoon with warm weather so we can head back! Amazingly I actually had watershoes for everyone but Grant and Jacob. I promised them I would have some for them before the next trip.....gymshoes and flip flops just don't work nearly as well! Luke slept the entire time (over 2 hours) that the kids played in the river. The joys of a lazy spring afternoon!


Make Garden Stepping Stones: http://familycrafts.about.com/cs/steppingstones/a/040201a.htm
We decided to make these with our gardening program. I will post pictures soon! I found these wonderful directions on the internet and compiled them here!
Page 1: Introduction
Home-made stepping stones are a great way to personalize your garden, walkway, or anywhere! They make great gifts and are also great keepsakes if they are made using children's handprints or footprints.
My kids and I had a lot of fun experimenting with our stepping stones. We made one with a handprint, one with our dog's paw prints, one with flattened marbles/gems, one with marbles, and we also used patio paint. You can get so creative while making these we can hardly wait to try more.
I ran across garden stepping stone kits at a nearby craft store for around $20.00 (this makes one stepping stone). I decided to NOT use a kit because it would have been too expensive since I wanted to make more than 1 stone. Instead, I ran to a few different stores to gather the items I felt I needed; believe it or not, the supplies to make ONE of my stepping stones ended up costing me about $3.00!
Let me tell you what I used and help you decide what you want to use...
Page 2: Gathering Supplies
As I said before, the cost to make one stone with the supplies I bought was about $3.00, which is great if you compare it to the $15.00 - $20.00 a garden stepping stone kit costs.
The main supplies you need to make a stepping stone is a mold, cement, and items to decorate or embellish it. You should also always use protective eyewear and gloves when working with concrete as it can burn. If any gets on bare skin, wash immediately with warm, soapy water. Here are lists of the items I bought along with some other options.
Molds :
Plastic Planter Saucer - This is what I used for my round stepping stones, and they worked great. The cost of these was under $1 a piece and they were reusable.
Clear, Plastic Stepping Stone Molds - For a bigger variety of shapes (octagon, square, etc) I went to a craft store and bought plastic stepping stone molds. Other than the shape, they were almost identical to the plastic planter saucers. They cost between $3 and $4 each and are reusable.
Cement :
Quick-Setting Concrete - This is available at hardware or home improvement stores. I used the cheapest Quikrete, under $2 for a 60-pound bag. While it worked just fine for us and the price was right, it was a little pebbly and next time I will spend a little more money to buy a slightly better grade. I made 5 stones and didn't even use half of the bag.
Stepping Stone Concrete - You can find this concrete mixture at crafts stores. It is made especially for use in stepping stones. This is bit spendy though; the average cost was about $5 to make 1 stone. This special concrete might be more worth your while if you are only planning on making 1 or 2 stones.
Decorations/Embellishments:
Things to embed in the stones:
Marbles
Pebbles/Stones
Shells
Beads
Flat Marble/Gems
Small Mosaic Tiles
Beach Glass
Stained Glass
Special Mementos/Souvenirs
Things to use to make prints/designs on the stones:
Cookie Cutters
Handprints - Paw Prints
Leafs
Popsicle Stick (to write names or witty verses)
Patio Paint (or other outdoor paint)
Stencils
Anything unique you have lying around the house
Now that you know what supplies to use, find out how to use them...
Page 3: Step-By-Step Directions
Deciding what design to make is the hardest part of making these stepping stones. However, you need to do this before you start so you know what supplies to gather.
Gather all your supplies and then you are ready to begin! Follow these simple steps and also refer to the suggestions on the supply page and hints and tips pages.
The first thing you should do is to protect your work surface and yourself. Lay down some newspaper, plastic sheeting, an old tablecloth, etc. Whether permitting, you can make these outside! Wear eye protection and rubber gloves... An old long sleeve shirt and sweatpants would also be a great idea.
Set your mold on your work surface. If you are using a special stepping stone mold follow any special directions if any that came with it. I used clear, plastic planter saucers and did nothing to prepare them and they worked perfect! If you are brave enough to try a cake pan or other household item, you should try coating them with a liberal layer of cooking spray or petroleum jelly.
Now, you are ready to mix up the concrete. Follow the manufacturers directions on the bag of concrete you are using. I used a bag of Quikrete, which really had no specific directions. I discovered that a mixture of 5 parts concrete to 1 part water worked well. Your mixture will vary depending on what kind of concrete you use, but the wet mixture should have the consistency of soft cookie dough.
Once your concrete is mixed, you can start spooning it into the mold. Fill the mold about half full and smooth it down. Lay your cut piece of screening or hardware cloth (as explained on the supplies page) into the mold and then finish scooping the cement into the mold until full.
Gently tap around the outside of your mold to help remove any air bubbles and also to help even out the top. Now leave your stepping stone alone to set up for 30 to 60 minutes before you add any embellishments or decorations - this is more important if you are making handprints or other prints in the cement.
Once the cement has been given some time to set up, you can start decorating it. Use the decorating/embellishment ideas listed on the supplies page or think of your own. If you make a mistake, you can simply remove the items, flatten out the top with the side of a popsicle stick or spoon, tap the sides to smooth, and start over again!
Your stepping stone must now sit for 2 - 3 days without being disturbed - do not move it. Once it is dry, you can gently pop it out of the mold. Voila!
Now, you can finish decorating it if you are planning on doing any painting. You can seal the top of your stepping stone with a clear acrylic sealer if you do use patio paints.
I would suggest letting your stepping stone sit for another week before putting it outside. When you place the stones outside they should not be raised above ground more than about 1/2-inch so people don't trip on them and also so the stone doesn't break.
One more thing... Before you make your own garden stepping stones, you might want to read these tips and helpful hints...
Here are some tips and hints that can help you while you make your stepping stones. Some of these tips have been said already, but they are worth repeating. Read on and have fun making your stepping stones!
If you are using cement dye, remember that the wet product will always be a shade or two darker that your finished product.
Your stepping stones should be at least 2 inches thick.
For best results, let your stepping stones set in the mold for 3 days. Allow the stones to cure for a week before placing them outside or stepping on them.
When gathering items for embellishing your stepping stones, steer clear of wooden items because they don't stick into the concrete very well.
Get creative with your embellishments! Try seashells, marbles, beach glass, mosaic tiles, buttons, small toys, and mementos of any sort.
Make prints in the cement after it has set for between 30 minutes to an hour.
Besides handprints and paw prints. Try making prints with other items such as dog biscuits, leaves, cookie cutters, etc.
If you want to try making stepping stones with pans or other household items, buy them at garage sales or thrift shops.
Your cement should be the consistency of cookie dough. You want to have to scoop it into your mold, not pour it.
When you place the stones in your garden they should not be raised above ground more than about 1/2-inch for risk of people tripping and falling and also so the stone doesn't break.
Once the cement is poured into the mold, do not move it! This can cause cracking (I found this out the hard way!).
If you make a mistake, you can simply remove the items, flatten out the top with the side of a popsicle stick or spoon, tap the sides to smooth, and start over again!
Tuesday, May 08, 2007
Stable Mates Program @ Green Acres
Monday, May 7 @1:00 PM
Cost is $5.00 a child
Open to all ages.
The Stable Mates program provides opportunities for participants to learn about, handle, and care for horses, as well as tour a working farm. In this program, the morning’s activities begin in the stable where the students will be given fun facts on horses, a demonstration on grooming techniques and a horse to groom. The students are then taken on a hayride to introduce them to the other farm animals.
Unfortunately I wasn't driving yet and Jay wasn't home so only 5 of the kids got to participate in this WONDERFUL program! Hannah, Emily , Grant, Jacob and Cade got to attend.
Apparently Jacob chose the LARGEST HORSE (he brought home a horseshoe from his horse and it is as big as his head, and those of you who know Jacob know he has a BIG HEAD!). The kids all learned a lot about horses and horse care.
Sunday, May 06, 2007
Belly bowl boy 
 Here is a picture of the completed belly cast, it still needs to be painted and hung.
  And here is a picture of the belly cast in the making! It was so much fun to preserve what has been such a huge part of my life for the last 9 months....or even more accurately, what has been such a huge part of my life for the past 17 years!

Here is a picture of Luke in the belly cast I had done the Sunday before he was born!
 Here is a picture of the completed belly cast, it still needs to be painted and hung.
 And here is a picture of the belly cast in the making! It was so much fun to preserve what has been such a huge part of my life for the last 9 months....or even more accurately, what has been such a huge part of my life for the past 17 years!
Subscribe to:
Posts (Atom)